The Basics - FAE
Outcomes, Actions, and Approaches
Now it’s time to start doing something. You need to leap from one moving train car to another. You need to search the entire library for that spell you really need. You need to distract the guard so you can sneak into the fortress. How do you figure out what happens?
First you narrate what your character is trying to do. Your character’s own aspects provide a good guide for what you can do. If you have an aspect that suggests you can perform magic, then cast that spell. If your aspects describe you as a swordsman, draw that blade and have at it. These story details don’t have additional mechanical impact. You don’t get a bonus from your magic or your sword, unless you choose to spend a fate point to invoke an appropriate aspect. Often, the ability to use an aspect to make something true in the story is bonus enough!
How do you know if you’re successful? Often, you just succeed, because the action isn’t hard and nobody’s trying to stop you. But if failure provides an interesting twist in the story, or if something unpredictable could happen, you need to break out the dice.
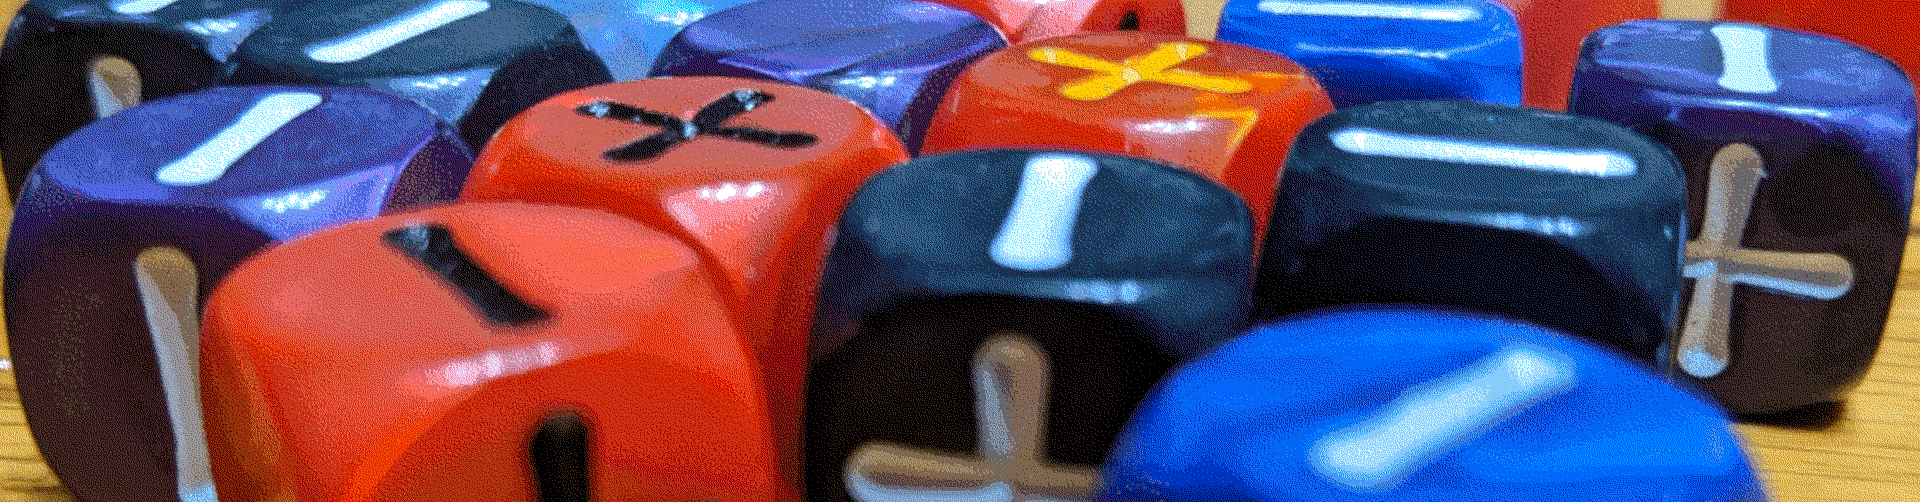
Fate Dice

Sometimes called "Fudge Dice" from the game for which they were originally designed. They are six-sided dice that have two each of +'s, -'s and blanks. You always roll the dice in a set of four. You may find these dice at your FLGS or online at Evil Hat Productions.
If you don't want to invest in special dice, you can also use regular six-sided dice borrowed from other games. Use 1 and 2 for -, 3 to 4 for a blank, and 5 to 6 for +.
In either case, you'll need at least four dice, and four per player (including the Narrator) is even better.
Outcomes
Once you roll your dice, add your approach bonus (we’ll talk about that in a moment) and any bonuses from aspects or stunts. Compare the total to a target number, which is either a fixed difficulty or the result of the Narrator's roll for an NPC.
Based on that comparison, your outcome is:
- Fail: You fail if your total is less than your opponent’s total.
- Tie: It’s a tie if your total is equal to your opponent’s total.
- Succeed: You succeed if your total is greater than your opponent’s total.
- Succeed With Style: You succeed with style if your total is at least three greater than your opponent’s total.
Shifts
The difference between the target number and your total is stated in Shifts. You can think of this as "Fate shifting in your favor" and when we get to combat, this concept of shifts will become much more vital than just the difference between succeeding and succeeding with style.
Now that we’ve covered outcomes, we can talk about actions and how the outcomes work with them.
Actions
So you’ve narrated what your PC is trying to do, and you’ve established that there’s a chance you could fail. Next, figure out what action best describes what you’re trying to do. There are four basic actions that cover anything you do in the game:
- Create an advantage
- Overcome
- Attack
- Defend
Create an Advantage
Creating an advantage is anything you do to try to help yourself or one of your friends. Taking a moment to very carefully aim your proton blaster, spending several hours doing research in the school library, or tripping the thug who’s trying to rob you—these all count as creating an advantage. The target of your action may get a chance to use the defend action to stop you. The advantage you create lets you do one of the following three things:
- Create a new situation aspect.
- Discover an existing situation aspect or another character’s aspect that you didn’t know about.
- Take advantage of an existing aspect.
Creating or discovering an aspect
- If you fail: Either you don’t create or discover the aspect at all, or you create or discover it but an opponent gets to invoke the aspect for free. The second option works best if the aspect you create or discover is something that other people could take advantage of (like Rough Terrain). You may have to reword the aspect to show that it benefits the other character instead of you—work it out in whatever way makes the most sense with the player who gets the free invocation. You can still invoke the aspect if you’d like, but it’ll cost you a fate point.
- If you tie: If you’re creating a new aspect, you get a boost. Name it and invoke it once for free—after that, the boost goes away. If you’re trying to discover an existing aspect, treat this as a success (see below).
- If you succeed: You create or discover the aspect, and you or an ally may invoke it once for free. Write the aspect on an index card or sticky note and place it on the table.
- If you succeed with style: You create or discover the aspect, and you or an ally may invoke it twice for free. Usually you can’t invoke the same aspect twice on the same roll, but this is an exception; success with style gives you a BIG advantage!
Taking advantage of an aspect
- If you fail: You don’t get any additional benefit from the aspect. You can still invoke it in the future if you’d like, at the cost of a fate point.
- If you tie or succeed: You get one free invocation on the aspect for you or an ally to use later. You might want to draw a circle or a box on the aspect’s note card, and check it off when that invocation is used.
- If you succeed with style: You get two free invocations on the aspect, which you can let an ally use, if you wish.
Overcome
You use the overcome action when you have to get past something that’s between you and a particular goal—picking a lock, escaping from handcuffs, leaping across a chasm, flying a spaceship through an asteroid field. Taking some action to eliminate or change an inconvenient situation aspect is usually an overcome action; we’ll talk more about that in Aspects and Fate Points. The target of your action may get a chance to use the defend action to stop you.
- If you fail: You have a tough choice to make. You can simply fail—the door is still locked, the thug still stands between you and the exit, the enemy spaceship is still On Your Tail. Or you can succeed, but at a serious cost—maybe you drop something vital you were carrying, maybe you suffer harm. The Narrator helps you figure out an appropriate cost.
- If you tie: You attain your goal, but at some minor cost. The Narrator could introduce a complication, or present you with a tough choice (you can rescue one of your friends, but not the other), or some other twist. See “Succeed at a Cost” in Running the Game in Fate Core for more ideas.
- If you succeed: You accomplish what you were trying to do. The lock springs open, you duck around the thug blocking the door, you manage to lose the alien spaceship on your tail.
- If you succeed with style: As success (above), but you also gain a boost.
Attack
Use an attack when you try to hurt someone, whether physically or mentally—swinging a sword, shooting a blaster rifle, or yelling a blistering insult with the intent to hurt your target. (We’ll talk about this in Ouch! Damage, Stress, and Consequences, but the important thing is: If someone gets hurt too badly, they’re knocked out of the scene.) The target of your attack gets a chance to use the defend action to stop you.
- If you fail: Your attack doesn’t connect. The target parries your sword, your shot misses, your target laughs off your insult.
- If you tie: Your attack doesn’t connect strongly enough to cause any harm, but you gain a boost.
- If you succeed: Your attack hits and you do damage. See Ouch! Damage, Stress, and Consequences.
- If you succeed with style: You hit and do damage, plus you have the option to reduce the damage your hit causes by one and gain a boost.
Defend
Use defend when you’re actively trying to stop someone from doing any of the other three actions—you’re parrying a sword strike, trying to stay on your feet, blocking a doorway, and the like. Usually this action is performed on someone else’s turn, reacting to their attempt to attack, overcome, or create an advantage. You may also roll to oppose some non-attack actions, or to defend against an attack on someone else, if you can explain why you can. Usually it’s fine if most people at the table agree that it’s reasonable, but you can also point to an relevant situation aspect to justify it. When you do, you become the target for any bad results.
- If you fail: You’re on the receiving end of whatever your opponent’s success gives them.
- If you tie or succeed: Things don’t work out too badly for you; look at the description of your opponent’s action to see what happens.
- If you succeed with style: Your opponent doesn’t get what they want, plus you gain a boost.
TAKING ACTION: THE 30-SECOND VERSION
- Describe what you want your character to do. See if someone or something can stop you.
- Decide what action you’re taking: create an advantage, overcome, attack, or defend.
- Decide on your approach.
- Roll dice and add your approach’s bonus.
- Decide whether to modify your roll with aspects.
- Figure out your outcome.
ACTIONS & OUTCOMES: THE 30-SECOND VERSION
Create an Advantage...
...when creating or discovering aspects:
- Fail: Don’t create or discover, or you do but your opponent (not you) gets a free invocation.
- Tie: Get a boost if creating new, or treat as success if looking for existing.
- Succeed: Create or discover the aspect, get a free invocation on it.
- Succeed with Style: Create or discover the aspect, get two free invocations on it.
...on an aspect you already know about:
- Fail: No additional benefit.
- Tie: Generate one free invocation on the aspect.
- Succeed: Generate one free invocation on the aspect.
- Succeed with Style: Generate two free invocations on the aspect.
Overcome
- Fail: Fail, or succeed at a serious cost.
- Tie: Succeed at minor cost.
- Succeed: You accomplish your goal.
- Succeed with Style: You accomplish your goal and generate a boost.
Attack
- Fail: No effect.
- Tie: Attack doesn’t harm the target, but you gain a boost.
- Succeed: Attack hits and causes damage.
- Succeed with Style: Attack hits and causes damage. May reduce damage by one to generate a boost.
Defend
- Fail: You suffer the consequences of your opponent’s success.
- Tie: Look at your opponent’s action to see what happens.
- Succeed: Your opponent doesn’t get what they want.
- Succeed with Style: Your opponent doesn’t get what they want, and you get a boost.
CONFLICTS: THE 30-SECOND VERSION
- Set the scene.
- Determine turn order.
- Start the first exchange.
- On your turn, take an action.
- On other people’s turns, defend against or respond to their actions as necessary.
- At the end of everyone’s turn, start a new exchange or end the conflict.
STRESS & CONSEQUENCES: THE 30-SECOND VERSION
- Each character starts with three stress boxes.
- Severity of hit (in shifts) = Attack Roll – Defense Roll
- Handle stress from shifts:
- You can check one stress box to handle some or all of a single hit to absorb a number of shifts equal to the number of the box you check: one for Box 1, two for Box 2, three for Box 3.
- You may also take one or more consequences. Mark off one or more consequence slots and write a new aspect for each. Mild = 2 shifts; moderate = 4 shifts; severe = 6 shifts.
- If you can’t (or decide not to) handle the entire hit, you’re taken out. Your opponent decides what happens to you.
- Giving in before your opponent’s roll allows you to control how you exit the scene. You also get one or more fate points for doing this!
- Stress and mild consequences vanish at the end of the scene, provided you get a chance to rest. Other consequences take longer.


Comments